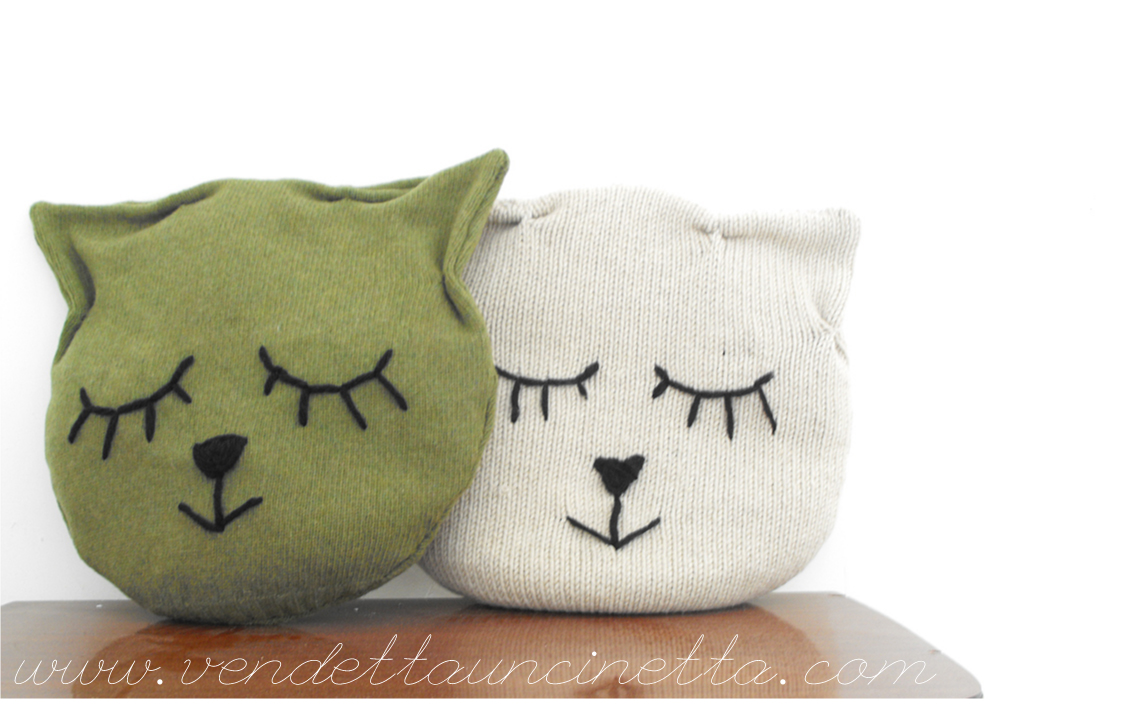
Dopo una pausa di circa un mese, rieccomi di nuovo con tante novità ed idee, tenetevi forte perchè ho da raccontarvi un sacco di cose! Cominciamo subito con un nuovo tutorial, il cuscino gatto il cui prototipo ho pubblicato due giorni fa sul mio Instagram e che ha ricevuto tantissimo apprezzamento, quindi eccomi qui con il facile tutorial!
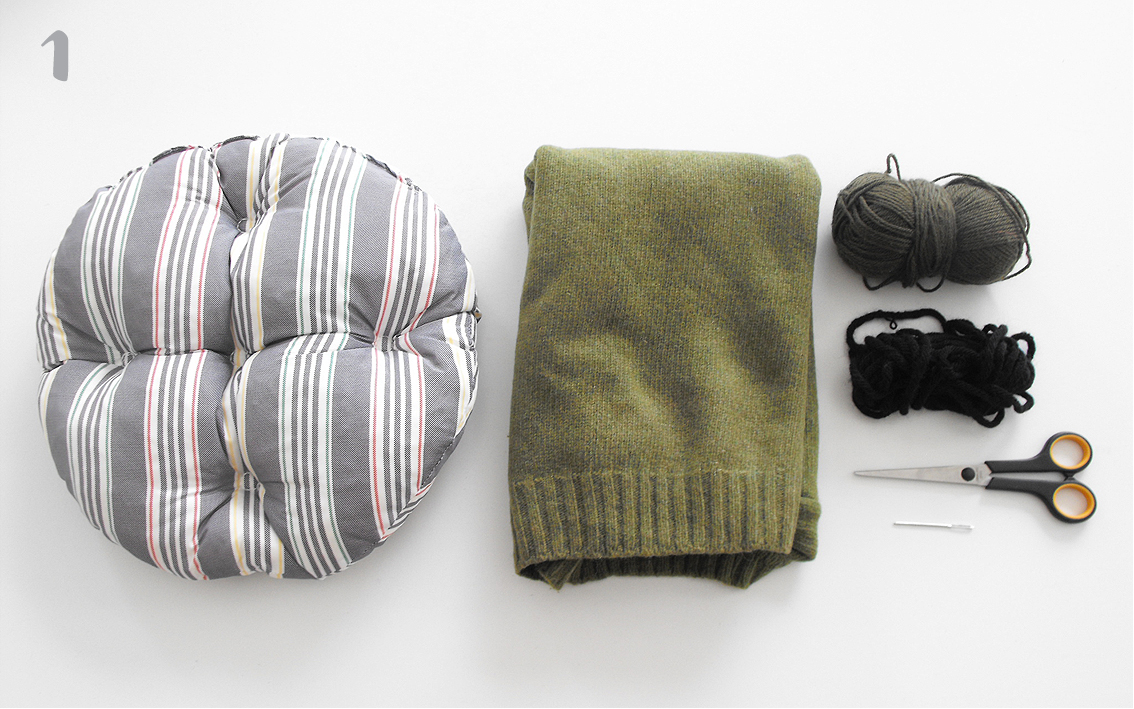
1-Occorrente: un cuscino rotondo e una federa quadrata adatta al cuscino, ma potete usare indifferentemente anche della stoffa oppure, come nel mio caso, un vecchio maglione (che strano, vero?^^), forbici da tessuto, ago da lana e filo nero per ricamare + filo per cucire il cuscino (lana se è lana o cotone/poliestere se è stoffa ed usate la macchina da cucire).
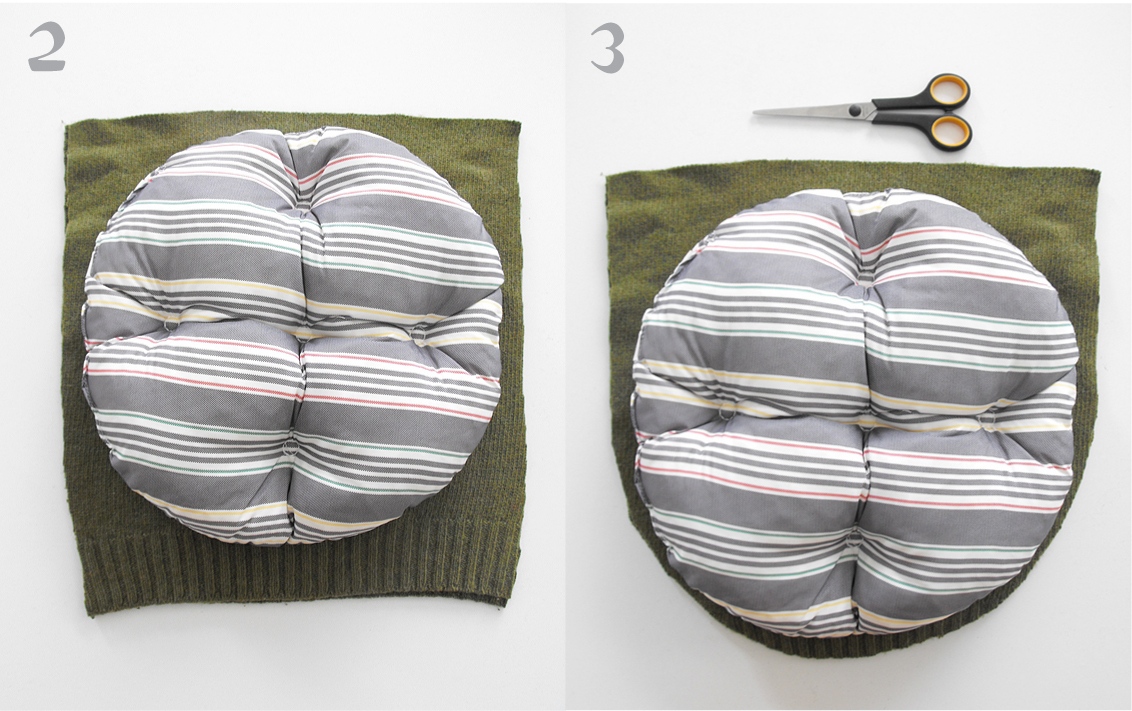
2-Piazzate il cuscino rotondo sui due strati di tessuto e tagliate un quadrato tutto intorno (questo passaggio non serve se avete già la federa quadrata).
3-A questo punto, nella parte inferiore tagliate via gli angoli in eccedenza, seguendo il profilo del cuscino..attenzione!Lasciate sempre un 5/6 cm di margine, considerate lo spessore e la cucitura del cuscino!
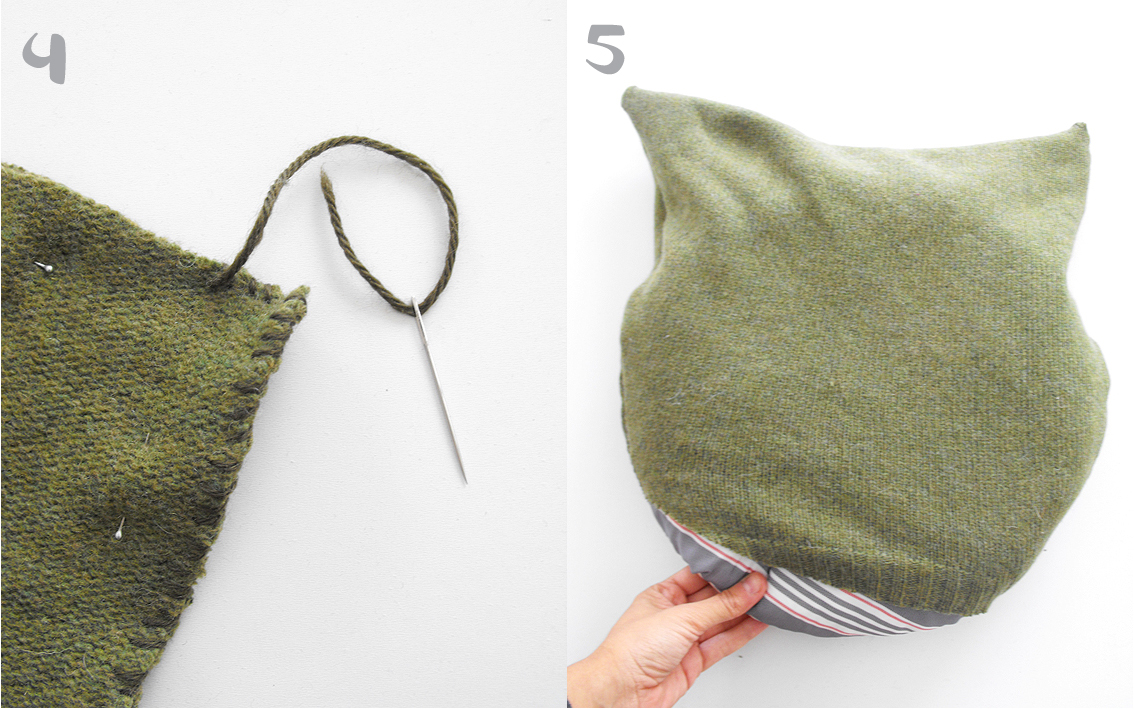
4-A questo punto rovesciate il tessuto, fermate i due lembi con gli spilli e cucite tutto intorno, lasciando una parte aperta in basso per rivoltare la nuova federa ed inserire il cuscino rotondo.
5-Rivoltate tutto ed inserite il cuscino.
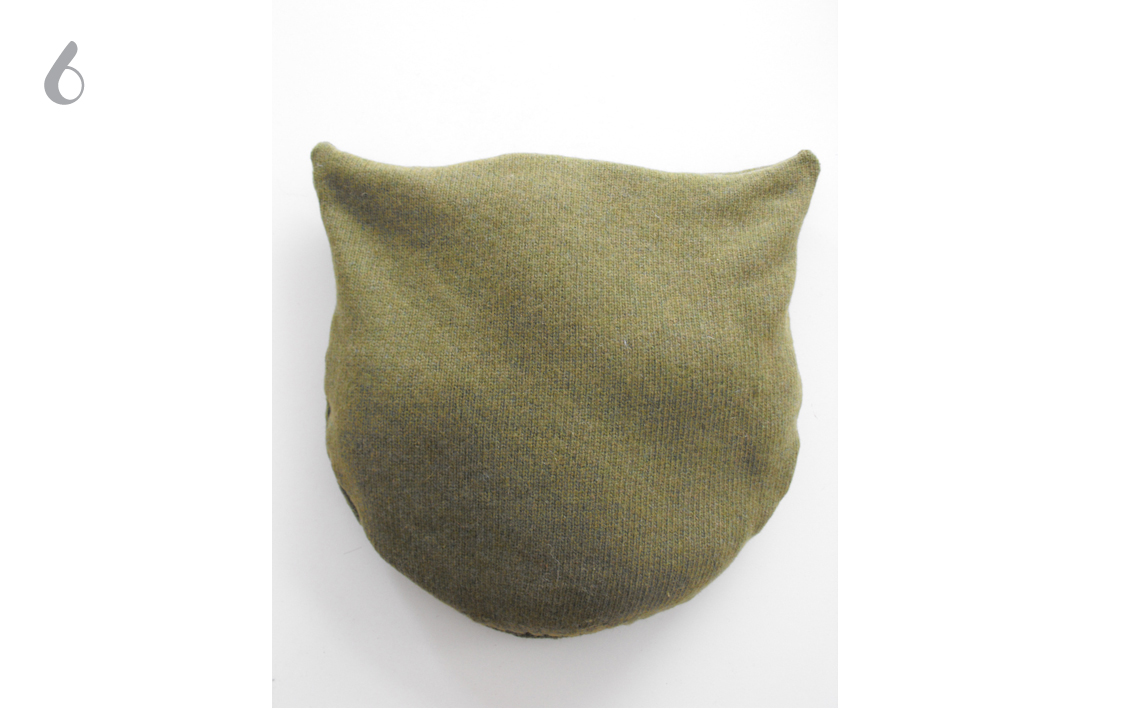
6-Cucite la parte in basso rimasta aperta.
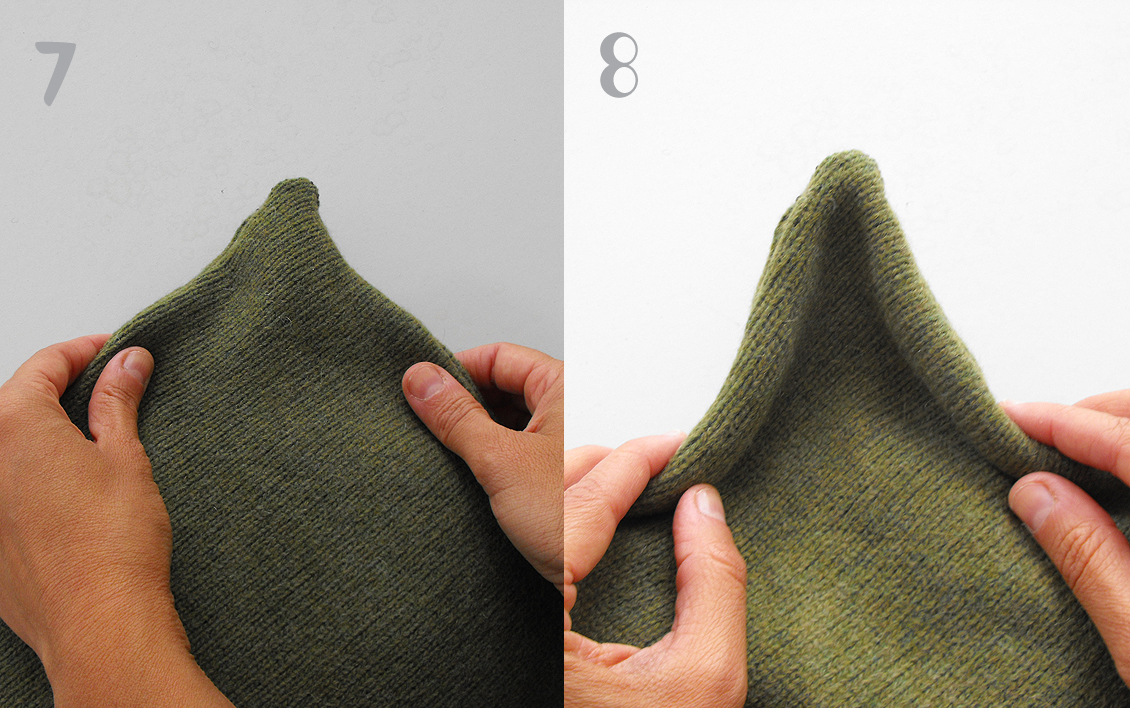
7/8-Per modellare le orecchie piegate il tessuto come nella foto e fermate con gli spilli.
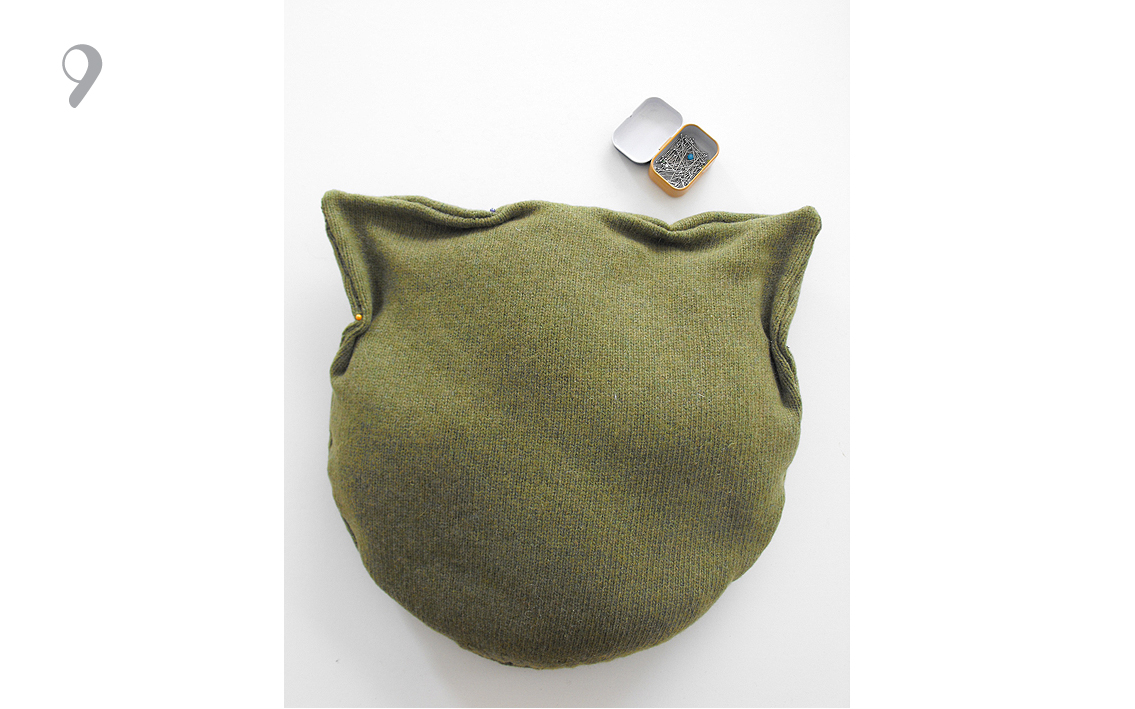
9- Ripetete per entrambe le orecchie.
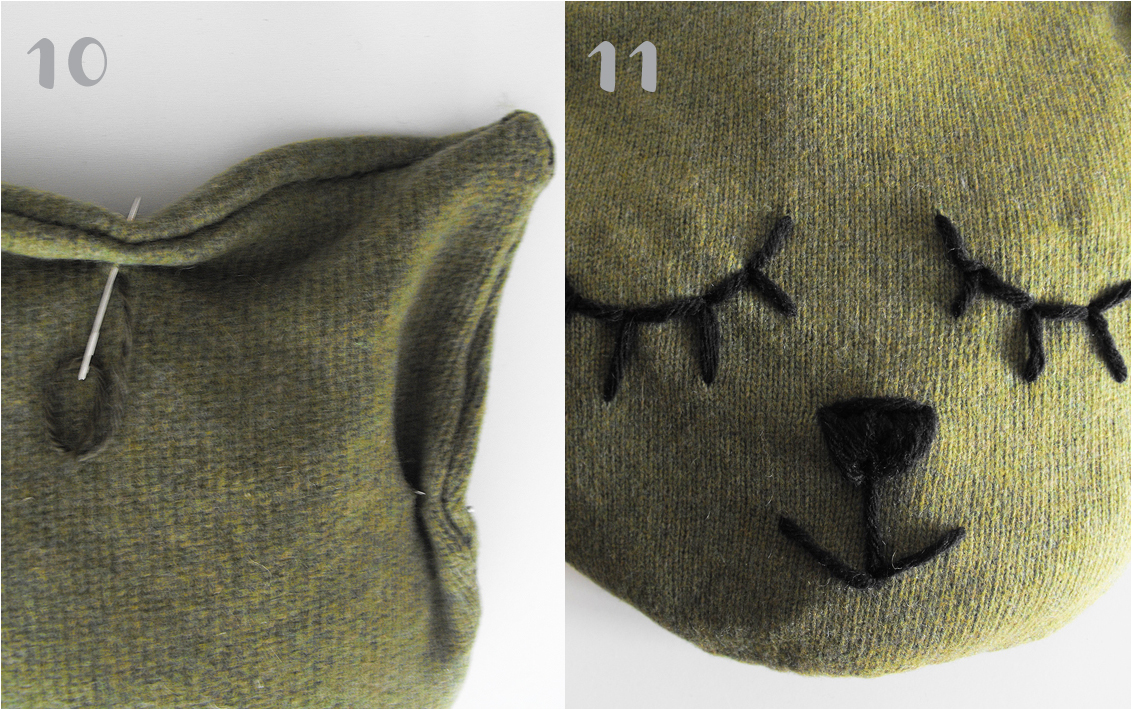
10-Fermare con qualche punto di cucitura le orecchie.
11-Con il filo di lana grosso, ricama il muso del tuo gatto!
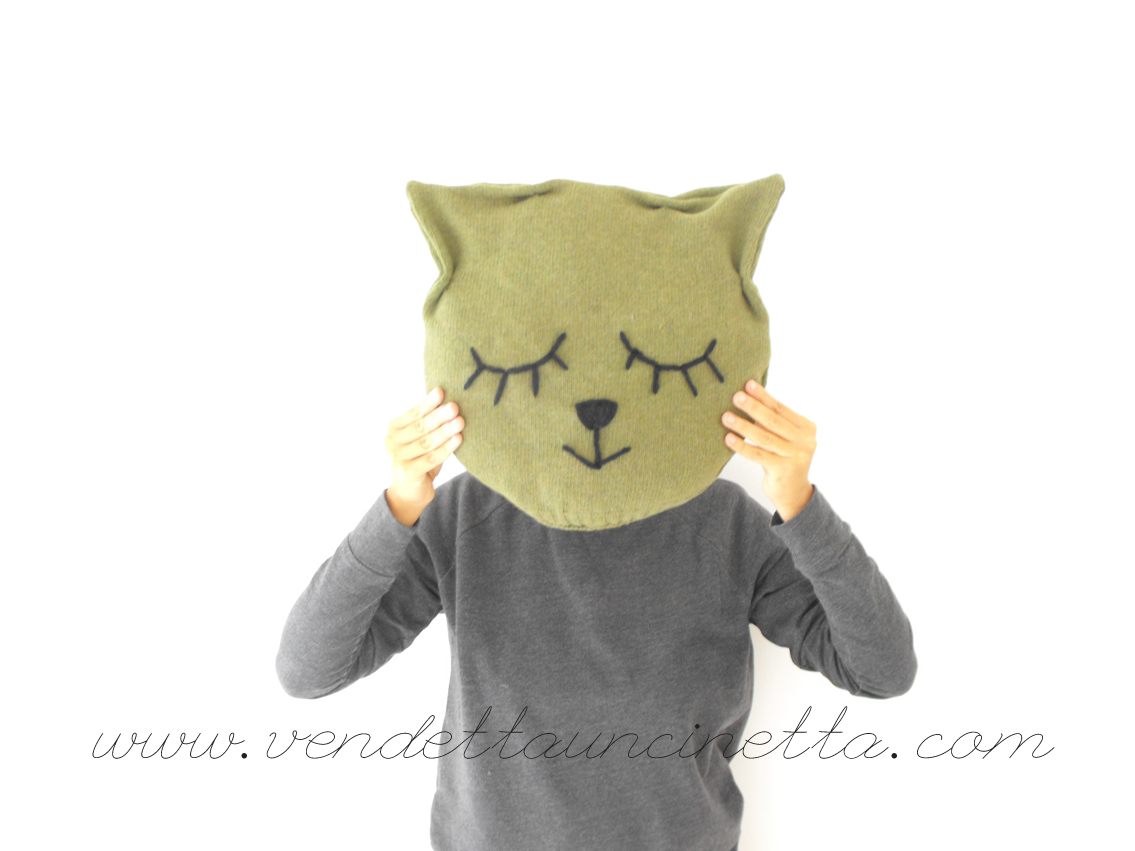
Et Voilà!
///ENG///
After a break of about a month, I’m back again with many news and ideas, let’s start with a new tutorial: the kitty pillow case I posted two days ago on my Instagram and that received a lot of appreciation!
1-You will need: a round pillow, and a square pillowcase which can fit it, but you can also use either normal fabric or, as in my case, an old sweater.
Then fabric scissors, needles, pins, black yarn wool to embroider,sewing thread (if you’re using a sweater like me, use matching wool yarn)
2-Place the round cushion on the two layers of fabric and cut a square shape all around (this step is not needed if you already have a square pillowcase).
3-At this point, cut away the bottom corners in excess, following the pillow’s shape…pay attention!Always let a 5-6 cm margin, considering the thickness and the seam of the pillow!
4-Turn inside out the fabric layers (right sides must meet), fasten the two edges with some pins and sew all around, leaving one end opened at the bottom, to turn inside out the new pillowcase and insert your round cushion.
5-Turn inside out and insert the pillow.
6-Sew the bottom side which was left open.
7/8-To shape the kitty ears, fold the fabric like is shown in the picture and secure with some pins.
9-Repeat for both ears.
10-Block the ears with a few stitches
11-With the chunky black yarn, embroider the muzzle of your cat!
Et Voilà!


