Quando sei un po’ fuori di testa come me, qualsiasi cosa vedi in giro la immagini come materiale da utilizzare.
E’ successo l’altro giorno mentre portavo fuori il mio cane, delle bellissime, carnose, foglie di Magnolia cadute sotto l’albero.
Le ho prese pensando di portarle a casa e di metterle in un vaso, poi l’idea, perchè non ricamarle?E pensate che anche Gaia di Patasgnaffiaveva avuto nello stesso momento un’idea alternativa sempre con le stesse foglie….
Ecco il tutorial per la serie “fermatele”:
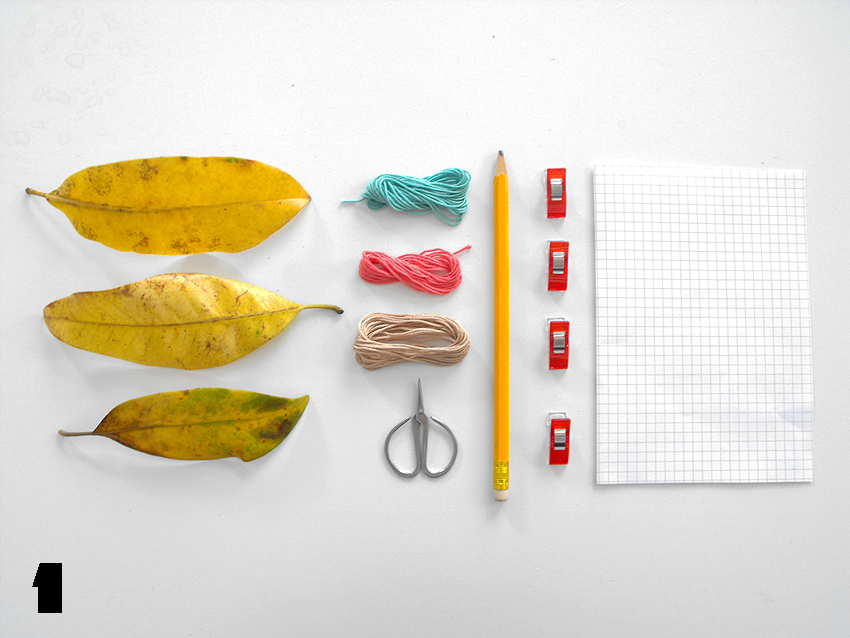
1-Occorrente:
foglie di magnolia (non ancora secche)
ago da lana a punta
carta quadrettata
filo da ricamo o cotone o lana sottile
matita/gomma
pinzette “Wonder Clips” Clover (vengono usate per i lavori di cucito con tessuti pesanti)
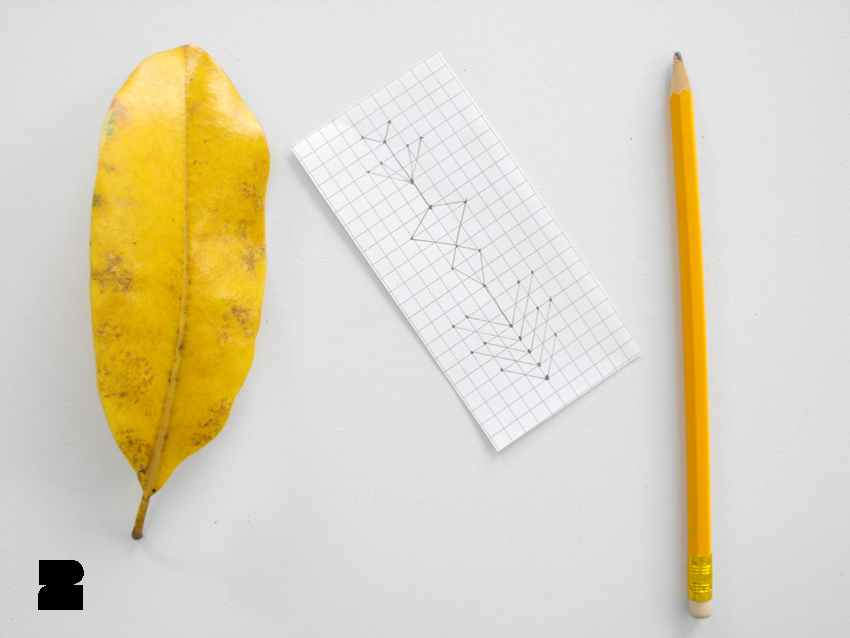
2-Fai un disegno geometrico sul foglio quadrettato con la matita
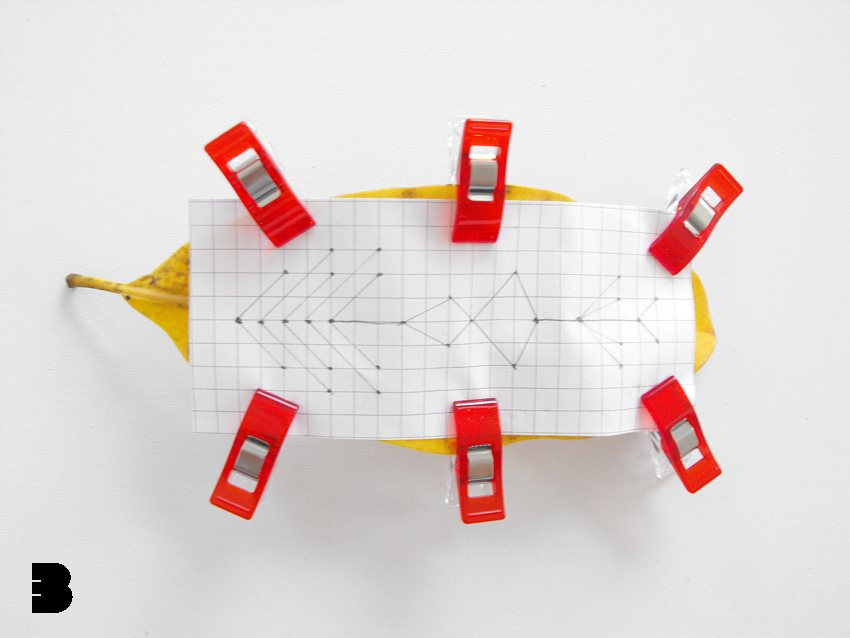
3-Taglia il foglio in modo che sia più o meno della misura della foglia ed applicala sopra tenendola ferma con le Wonder Clips (se non le hai puoi usare delle mollette per i panni, gli spilli bucano la foglia!)
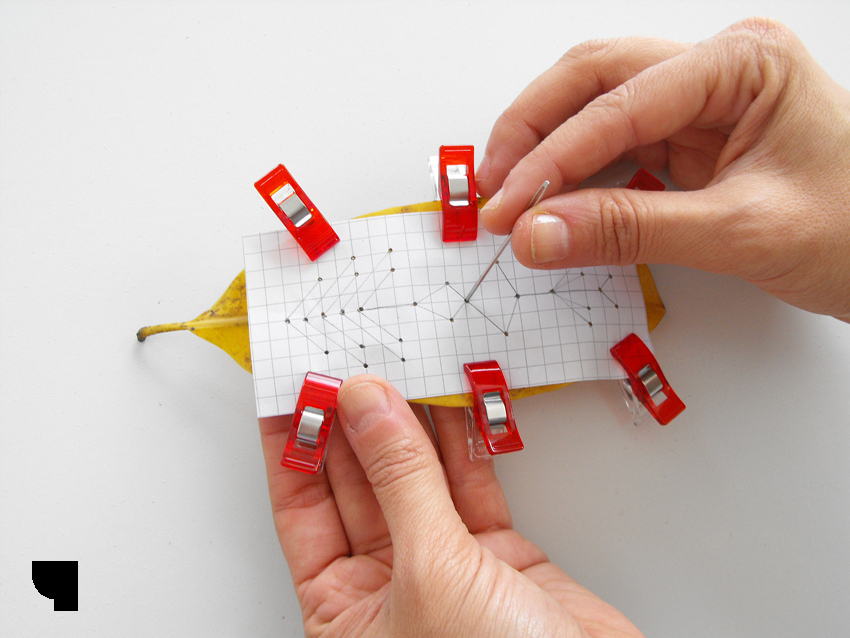
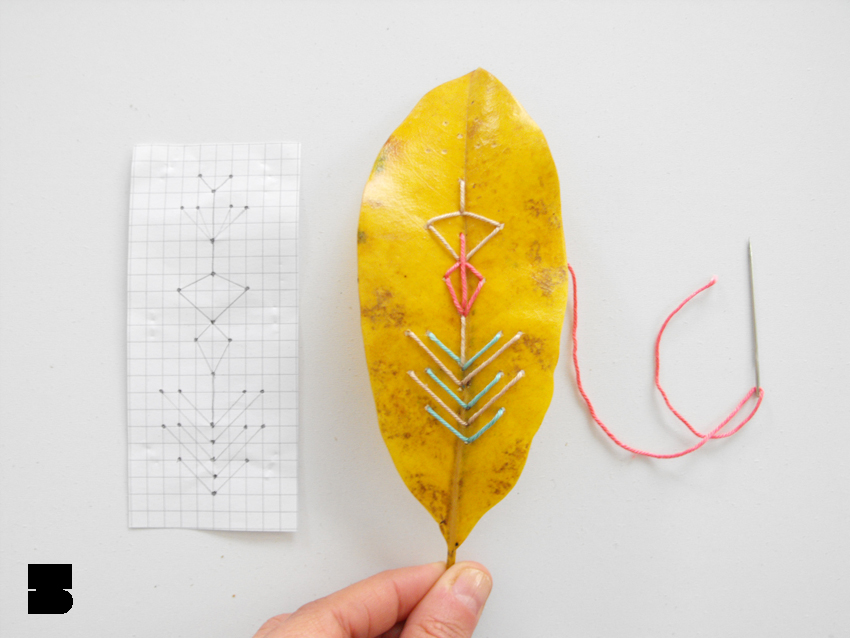
4-Con l’ago da lana, fora tutti i punti in cui il disegno incontra la quadrettatura.
5-Togli il foglio e ricama il tuo disegno utilizzando i buchi che hai fatto in precedenza, sentirai che profumo!
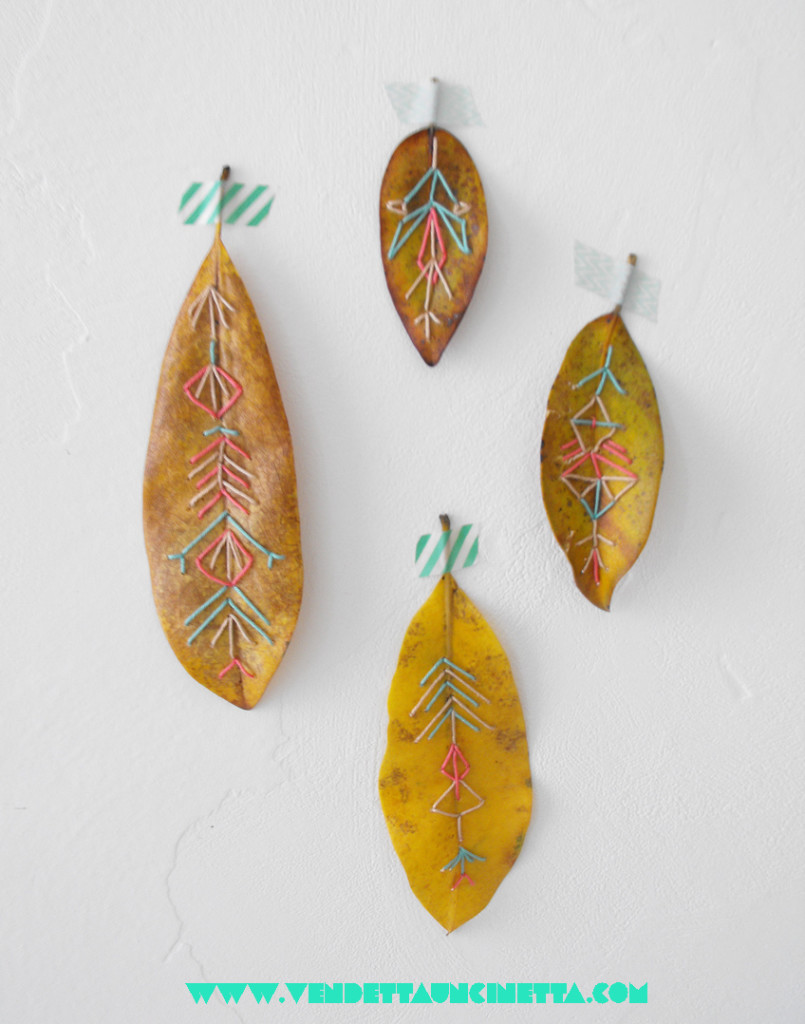
Ora che hai ricamato le tue foglie puoi utilizzarle come decoro per una parete o come chiudipacco!
Un consiglio: le foglie, seccandosi, tendono ad arricciarsi, se non vuoi che accada, mettile tra i fogli di un grosso libro, anche secche sono bellissime!

Vuoi avere un’altra idea per utilizzare queste foglie?Dai un’occhiata al tutorial di Gaia Ottogalli nel suo blog Patasgnaffi!
ENG:
When you’re a little crazy like me, everything you see around are supplies to be used.
It happened the other day as I carried out my dog, I saw beautiful, thick leaves of Magnolia fallen under the tree.
I got them thinking to simply take them home and put them in a vase, then the idea, why not embroider them? Also my friend Gaia from Patasgnaffi had an alternative idea at the same time always using same leaves ….
Here is the tutorial for the “stop it”
1-You will need:
magnolia leaves (not dried)
knitting needle
“chckered” paper
embroidery floss or cotton wool or any thin yarn
pencil / eraser
Clover‘s “Wonder Clips” (they are normally used for sewing heavy fabrics)
2-Make a geometric drawing with the pencil on the paper.
3-Cut the paper so that it is more or less the size of the leaf and apply it over holding it with Wonder Clips.
4-With the knitting needle, pierce all the points on which the design meets the grid.
5-Take off the paper and embroider your design using the holes that you made earlier, you will smell the perfume coming from your leaf!
Now that you have your embroidered leaves you can use them as a wall decoration or as a gift tag!
Ttip: leaves, drying up, tend to curl… if you do not want this to happen, put them between the pages of a large book, also dried are gorgeous!
Do you want another idea to use these leaves? Take a look at Gaia Ottogalli’s tutorial in her blog Patasgnaffi! < / a>


