Dopo il loro debutto ad Abilmente, ecco qui il tutorial dei “mini kitty”, o come li ha chiamati qualcuno, i gattini crochet da taschino: sono facilissimi da fare ed adatti a tanti utilizzi: oltre che come mascotte potrai utilizzarlo come spilla, decorazione accessori o chiudipacco, ma anche per un regalino velcissimo (magari infilato in una scatolina/casetta).
(Oltre ovviamente per tutte noi malate di foto e social, sarà un perfetto piccolo elemento da infilare nelle classiche fotografie colazone di instagram, chevvelodicoaffà, vicino alla tazzina).
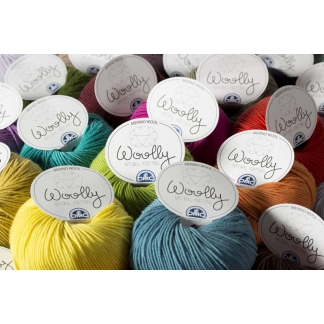
Ecco cosa ti servìrà:
Uncinetto 3 (lo sapete, io uso ed adoro gli Amour di Clover, ve li stra consiglio perchè fanno davvero la differenza)
Pochi grammi di filato di finezza 3 (io ho usato il morbidissimo Woolly di DMC, in 100% Merino)
Un avanzo di filo nero
Ago da lana
Forbici
 Procedimento:
Corpo:
Avvia 6 catenelle (attenzione di non includere nel conto l’anello iniziale!)
1° – 26° giro: tutto maglia bassa
27° giro: lavora [1 mb – 1 cat – 1 ma – 1 cat- 1mb] tutto nella prima maglia. Poi prosegui con 3 mb e nell’ultima maglia lavora di nuovo la serie da [a].
Chiudi con una mezza maglia bassa sul lato del rettangolo. Chiudi e taglia il filo lasciandolo abbastanza lungo.
Zampe Posteriori:
Avvia 10 catenelle (attenzione di non includere nel conto l’anello iniziale!)
1° giro: tutto maglia bassa. Chiudi e taglia il filo lasciandolo abbastanza lungo.
Ripeti per la seconda zampa.
Zampe Anteriori:
Avvia 8 catenelle (attenzione di non includere nel conto l’anello iniziale!)
1° giro: tutto maglia bassa. Chiudi e taglia il filo lasciandolo abbastanza lungo.
Ripeti per l’altra zampa.
Confezione:
Ripiega il rettangolo del corpo su se stesso facendo combaciare il lato corto del 1° giro sotto l’ultimo giro (quello con le orecchie).
Infila l’ago nel filo che hai lasciato dalla chiusura del corpo e, dopo aver imbottito leggermente il corpo (io uso del filo dello stesso gomitolo),
cuci esternamente i tre lati aperti (fianchi e “testa”). Non tagliare il filo ma con lo steso, fai una piccola filza (cioè una serie di punti) attorno all’altezza del “collo”, per tutta la circonferenza.Stringi un pochino il filo in modo che si crei una piccola strozzatura che servirà per segnare il collo del gattino.
Chiudi, nascondi l’avanzo di filato nel lavoro e taglia il filo.
Ora cuci al corpo le due zampette più lunghe sul fondo e le più corte all’altezza spalle.
Prima di chiudere infila il filo ancora in modo che fuoriesca all’altezza di quello che sarà il sedere del povero malcapitato, lascia il filo penzolante e fermalo con un nodino in fondo, sarà la sua coda.
Con dell’avanzo di filo nero e partendo dalla nuca, ricama occhi e muso del gattino. Volendo puoi aggiungere altri dettagli come una lettera sul corpo, un cappietto dietro, un papillon o una cresta punk!

/ / / ENG / / /
After their debut in Abilmente’s fair, here’s the pocket kittens crochet tutorial! They’re easy to make and suitable for many uses: a mascot, a brooch, a decoration for accessories (as hats and bags) , a gift tag, but also a quick present.
Here’s what you’ll need:
Hook size 3 ( as you know, I only use and love Clover Amour hooks, they really make the difference!)
A few grams of baby yarn (I used the super soft Woolly by DMC,in 100% Merino wool)
A surplus of black thread
Knitting needle
Scissors
Body:
Ch 6
Round 1° -26: all single crochet (5 st)
Round 27°: in the same st work: [1 sc – 1 ch – 1dc -1 ch – 1 sc]. Then follow with 3 sc and in the last st work again from [a], you’ll have the kitty ears this way!
Close with a ss on the side of the rectangle. Close and cut leaving a quite long tail.
Legs:
Ch 10
Round 1: all single crochet. Close and cut leaving a tail for seewing to the body.
Repeat for the second paw.
Arms:
Ch 8
Round 1: all single crochet. Close and cut leaving a tail for seewing to the body.
Repeat for the other paw.
Sewing:
Fold the body rectangle on itself by matching the short side of the 1st round under the final one (the one with the ears).
Slightly stuff the body with some left yarn and sew the three open sides. At the end do not cut the thread but instead do a small string (a series of points) around the height of the cat’s “neck”.Pull yarn a little bit so that it will create a small narrowing that will be the kitten’s neck.Close, hide the surplus of yarn and cut.
Now you will have to sew the paws to the body.
Before cutting the thread slip it again so that it comes out from the bottom, leaving the thread dangling and stop it with a knot, it will be the tail.
With some left black yarn, embroidery cat’s eyes and muzzle. You may wish to add other details such as an embroidered letter on the body, a loop, a bow tie or a punk mohawk!


