Ho avuto un po’ di problemi col sito e per due settimane non sono potuta entrarell’area admin,
quindi ecco qui solo ora la seconda parte del mio tutorial uncinetto per la borsa in rete! Avete fatto come vi ho indicato nella prima parte del tutorial, avete fatto tanti giri di punto rete fino ad aver raggiunto l’altezza voluta della vostra borsa?
Bene, ora vedremo come completarla, chiudere il fondo ed inserire i manici!
Continua la tua borsa sempre usando lo stesso cotone ed uncinetto (Io sto usando uncinetto 4 Clover Amour e il 100% cotone peruviano Pima Cotton di BettaKnit!)
Procedimento:
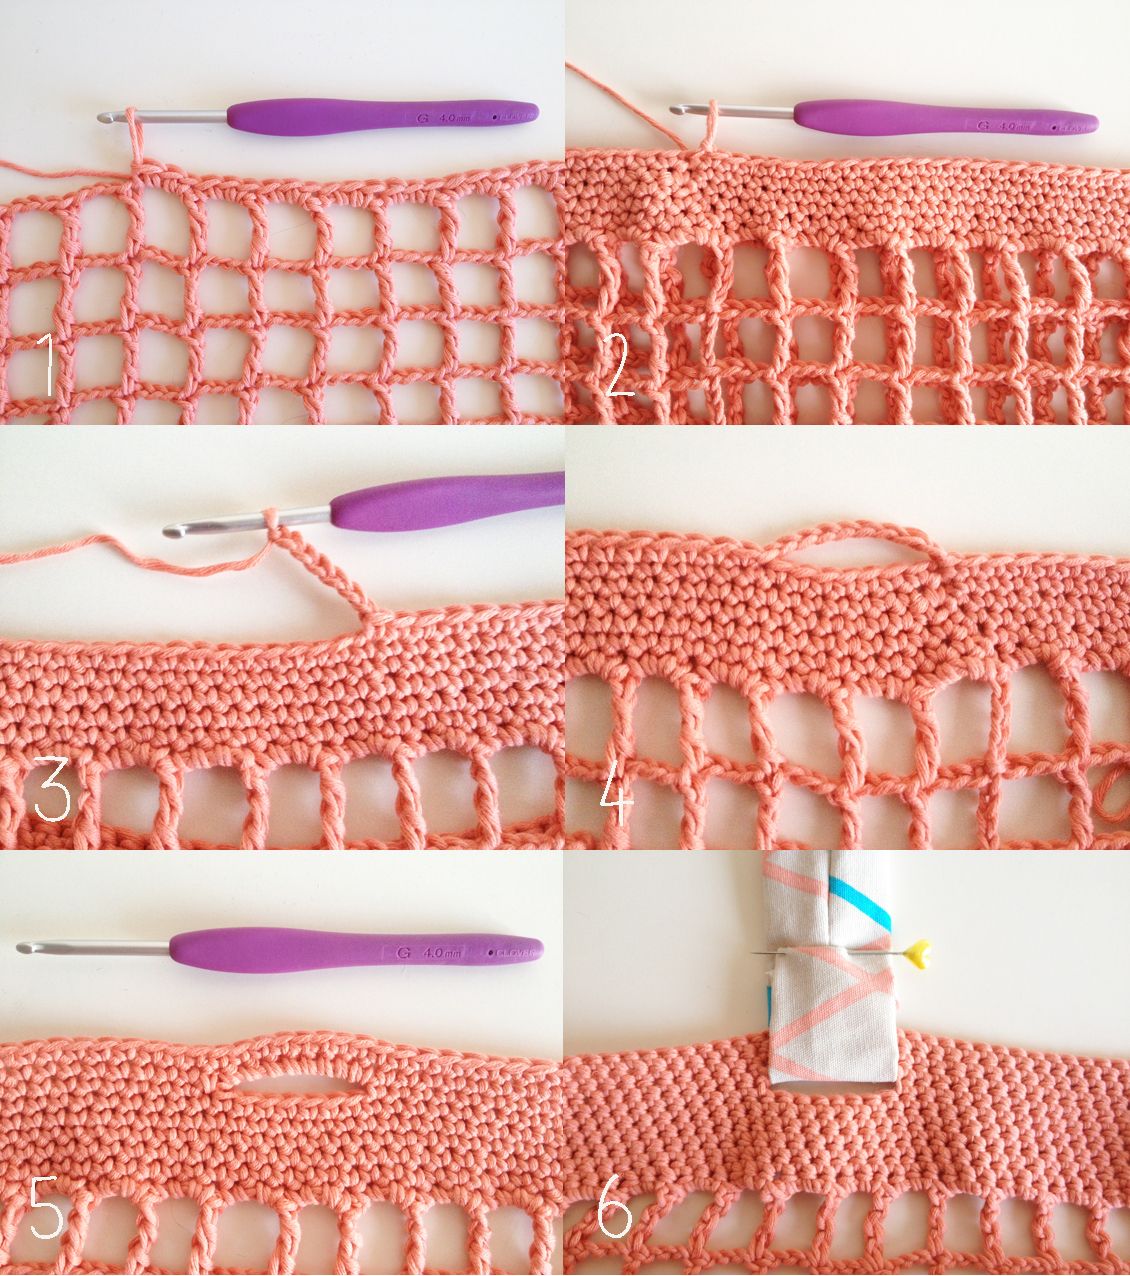
1- Una volta raggiunti i giri di punto rete voluti, fai un giro di maglia bassa, lavorando 3 maglie basse all’interno di ogni archetto del giro di rete precedente.Chiudi il giro con 1 mezza maglia bassa.
2- Fai altri giri di maglia bassa a piacere lavorando normalmente, io ne ho fatti 5!
3- Per formare le asole dove inserirai i manici, parti come sempre a maglia bassa e, dove vuoi far partire il tuo manico, lavora 7 catenelle volanti (ma puoi farne anche meno o di più, a seconda di quanto largo è il manico che vuoi inserire).
4- Salta lo stesso numero di catenelle del giro precedente (nel mio caso: 7) e continua normalmente a lavorare a maglia bassa.Fai lo stesso per le altre asole, ti consiglio di marcare prima la posizione che vuoi con degli spilli e stare attenta al conto dei punti fra l’una e l’altra in modo che siano simmetrici.Chiudi il giro con una mezza maglia bassa.
5-Nel giro successivo lavora a maglia bassa normalmente e quando arrivi all’asola lavora a maglia bassa all’interno del “buco” in modo da rifinire l’asola.Chiudi il giro con una mezza maglia bassa e fai altri giri di maglia bassa a piacere.
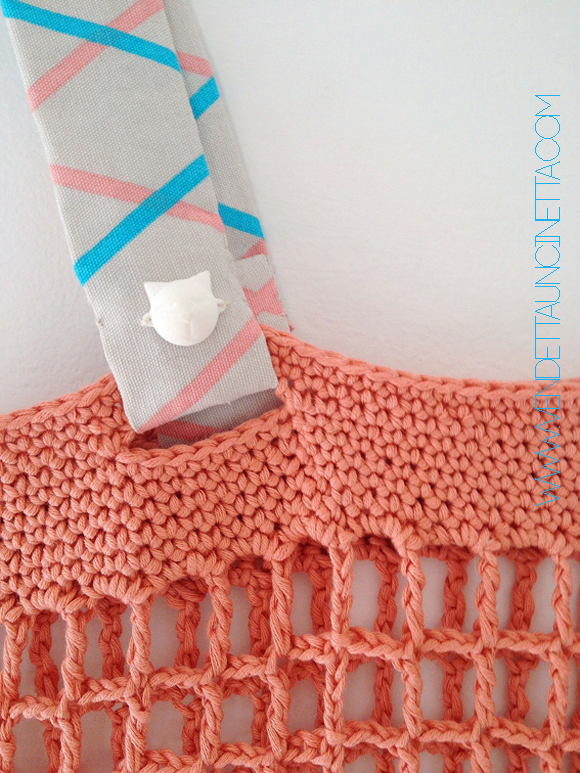
6- Come manici puoi usare una vecchia cintura o anche un bel foulard annodato. Oppure puoi fare i manici sempre ad uncinetto lavorando due striscie a maglia bassa della lunghezza voluta. Io ho realizzato i manici con del tessuto Ikea, fermandolo con uno spillo e poi cucendolo.
Per il fondo:
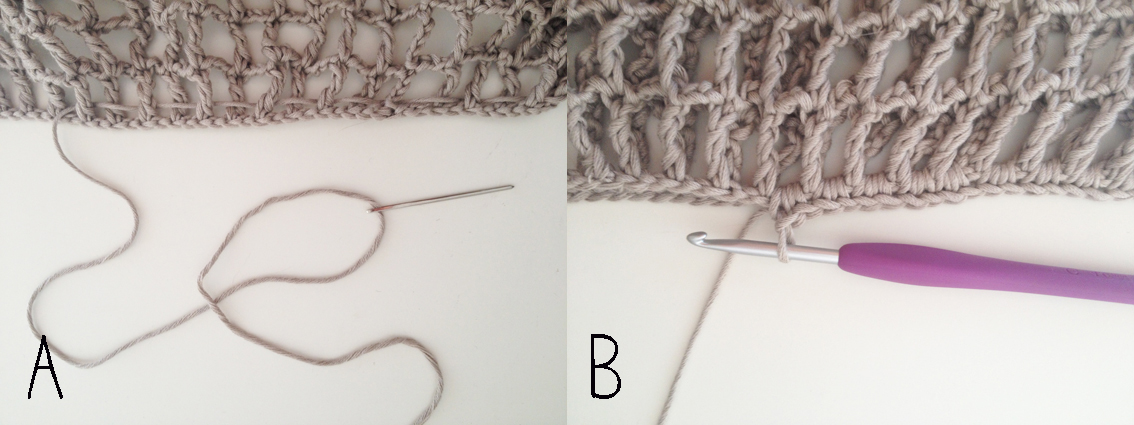
Soluzione A – Infila semplicemente un filo di cotone con un ago da lana senza punta tra il giro del fondo della tua borsa, stringi in modo da arricciare tutto e ferma con qualche punto di cucitura.
Soluzione B – Appiattisci la borsa in modo da far coincidere bene il primo giro di catenella e fai un giro di maglia bassa prendendo contemporaneamente i due strati.
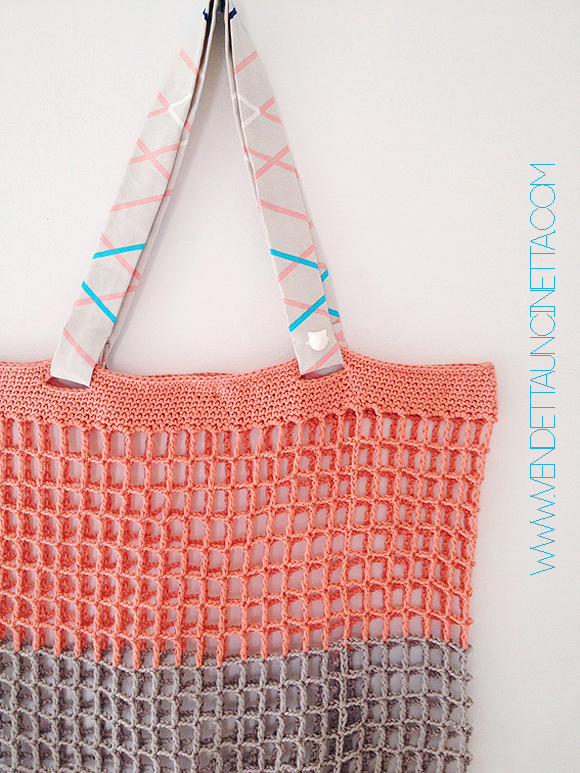
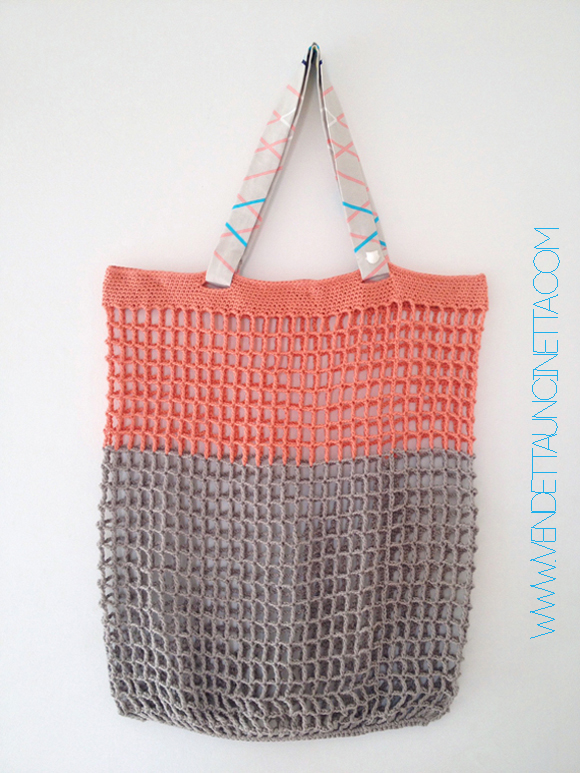
Pronta per andare al mare? La borsa realizzata con questo tutorial la trovi in vendita sul mio Etsy!
▲▲▲ ENG: ▲▲▲
I had a bit of technical problems with my site so I can finally post the second part of my crochet net bag tutorial ! Did you remember the first part? Have you done as many rounds as you have reached the perfect height of your bag? Well, now we will learn how to complete it, how to close the bottom and insert the handles!
Follow to work your bag using the same cotton and crochet hook you did until now ( I’m using a size 4 Clover Amour crochet hook and 100% Peruvian cotton by Pima Cotton BettaKnit! )
How to:
1- Once you’ve reached the height you desire, work a round of simple crochet, working 3 stictches inside each little arch of the previous round.Close the round with 1 slip stitch.
2- Make other rounds working in simple crochet as you want, I’ve made 5 rounds.
3- To build the eyelets where you will insert the handles, start the round working in simple crochet as usual and where you want to place your eyelet, work 7 chains (but you can make less or more, depending on the width of your handle).
4- Skip the same number of chains of the previous round (in my case:7) and follow by simple crochet.Repeat for the other eyelets, you should first mark the position you want to place them by pins. Close the round with a slip stitch.
5-In the next round follow by simple crochet and when you reach the eyelet, crochet pointing the hook inside the “hole” in order to better finish the eyelet appearance. asola.Close with a slip stitch and work other rounds of simple crochet as you desire.
6- As handles you can use an old belt or even a nice silk scarf with a simple knot. But you can make the handles by crochet too, working two crocheted stripes by simple crochet. I’ve used some matching Ikea fabric!
To close the bottom:
A method – simply insert a strand of cotton with the h of a knitting needle around the bottom of your bag, tighten (so the bottom will curl) and close with some stitches.
B method- Flatten the bag to line up the first round of chain.Work a round of simple croche taking the two layers together.
Ready to go to the beach? By the way, the bag I made from this tutorial it’s on sale on my Etsy!